• MY ACCOUNT
  • 0 items - $0.00

The Docksider


Our Dock Mounted Kayak Lift Rack
  • Home
  • Shop
    • Kayak Dock Lift & Storage
    • Paddleboard / SUP Dock Lift & Storage
    • Canoe Dock Lift & Storage Rack
    • Wall Mount Kit
    • Parts
  • About The Docksider
    • Testimonials
    • FAQS
    • How To Choose the Right Docksider
    • Assembly & Installation
    • Customer Installations
    • Must see Videos!
  • About Us
    • Our Philosophy
    • Our Brochure
  • Blog
  • Contact

August 23, 2024 by Ed Wrobbel Leave a Comment

Choosing a Stand-Up Paddle Board

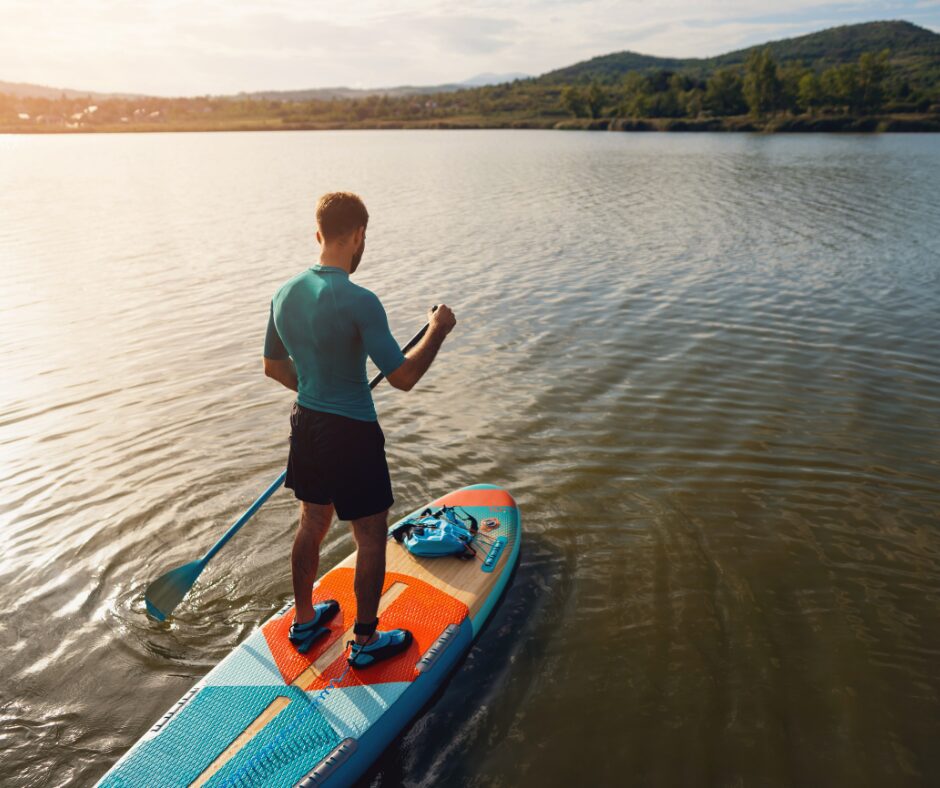
When it comes to selecting the perfect stand-up paddle board (SUP), the choice often narrows down to two types: fiberglass and inflatable. Each type has its own set of advantages, and the right one for you depends on your specific needs, preferences, and intended use. In this post, we’ll explore the differences between fiberglass (also called rigid or hard boards) and inflatable paddle boards, and provide tips on how to properly store your board using the Docksider Paddle Board Dock Lift and Storage Rack. 

Fiberglass Paddle Boards

Pros:

  • Performance: Fiberglass paddle boards are known for their superior performance in terms of speed and maneuverability. They offer a smooth, stable ride, making them ideal for more experienced paddlers and those looking to cover long distances.
  • Time Saver: Since you don’t need to add air to a fiberglass SUP, you are good to go when you get to your destination. 
  • Aesthetics: Fiberglass boards often have a sleek, polished appearance and can be customized with different designs and colors. 

Cons:

  • Weight: Fiberglass boards are typically heavier than their inflatable counterparts, making them harder to transport and carry.
  • Durability: While they are a more solid board, they are easier to dent or scrape than inflatable paddle boards.
  • Storage Space: They require more storage space due to their rigid structure, which can be a drawback if you have limited storage options or want to travel with your SUP.
  • Cost: Generally, fiberglass paddle boards are more expensive than inflatable ones.

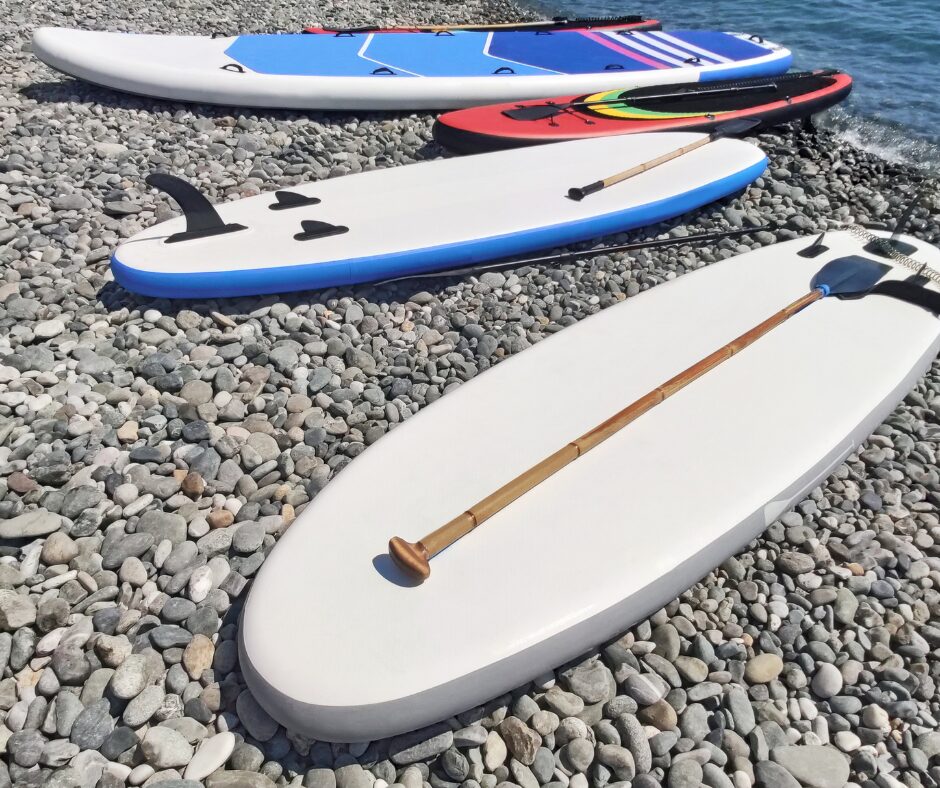
Inflatable Paddle Boards

Pros:

  • Portability: Inflatable paddle boards are lighter in weight and can be easily deflated and packed into a compact size, making them convenient for travel and storage.
  • Ease of Storage: When deflated, these boards take up minimal space, allowing you to store them in small areas such as closets or car trunks.
  • Durability: Modern inflatable boards are made with high-quality materials and can be surprisingly durable, often withstanding bumps and scrapes that might damage a fiberglass board.
  • Cost: Inflatable boards are generally more affordable, making them a great option for beginners or those on a budget.

Cons:

  • Performance: While inflatable boards have come a long way in terms of performance, they still don’t quite match the speed and responsiveness of fiberglass boards.
  • Inflation/Deflation Time: You’ll need to spend time inflating and deflating the board before and after use, which can be an inconvenience.
  • Maintenance: Inflatable boards require careful handling to avoid punctures and need to be thoroughly dried before storage to prevent mold and mildew.

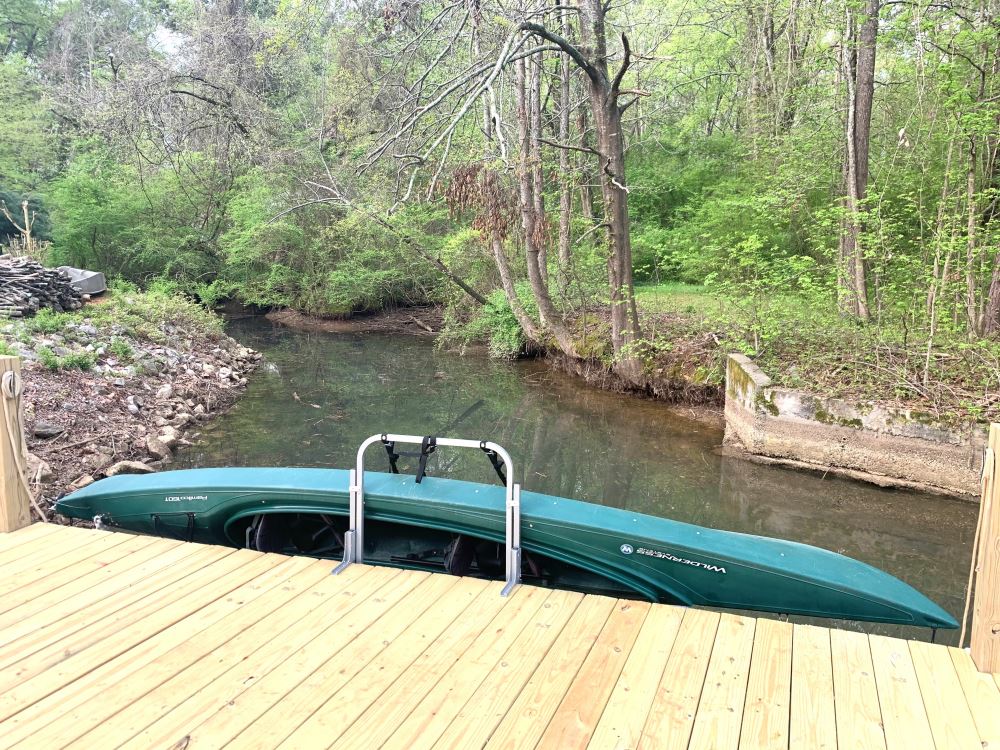
Storing Your SUP with the Docksider Paddle Board Lift & Storage Rack

Regardless of the type of paddle board you choose, proper storage is essential to maintain its condition and extend its lifespan. If you have your own dock, stop lugging your SUP to and from the water. The Docksider Paddle Board Rack is a versatile and convenient storage solution for paddle boards, making accessing your board at your dock easy. Simply choose from a water entry or dock entry rack and install the lift and storage solution to your dock. The next time you are ready to get out on the water, simply lower the lift assist lever and slide your SUP out. When you’re done using it, just load and lift it to store your board.  

If you live somewhere with all four seasons and need to store your SUP during the colder months, the Wall Mount Rack Kit transforms your Docksider Lift & Storage Rack for the wintertime. Easily store your SUP inside a garage, shed, or cottage, away from the harsh winter weather, when you aren’t using it. 

By choosing the right type of paddle board and storing it properly with the Docksider Paddle Board Lift & Storage Rack, you can ensure that your board remains in excellent condition for many seasons of paddling. Whether you opt for the performance of a fiberglass board or the convenience and portability of an inflatable one, taking the time to care for your board will enhance your overall paddle-boarding experience. 

Filed Under: Blog, Paddle Boards Tagged With: Dock Storage Racks, Paddle Boards, SUP

May 30, 2024 by Ed Wrobbel Leave a Comment

Installing a Kayak Lift System: DockCraft Makes It Easy!

Docksider Kayak Lift System in action

If you’re an avid kayaker, you know that storing your kayak securely and conveniently can be challenging. Enter the Docksider, our innovative kayak lift system. The Docksider is designed to simplify the process of launching and storing your kayak, making your time on the water more enjoyable and less of a hassle. In this blog post, we will guide you through the installation and show you how easy it is to get started with the Docksider Kayak Lift and Dock Rack.

Why Choose the Docksider?

1. Convenience: The Docksider allows you to easily launch your kayak and retrieve it from the water when you’re done. No more struggling to lift your kayak out of the water or worrying about it being damaged during storage.

2. Durability: Made with rustproof marine-grade aluminum, the Docksider is designed to withstand all types of weather and provide long-lasting performance.

3. Easy to Use: The Docksider is easy to install with straightforward instructions and even easier to use. Effortlessly lift and lower your kayak into and out of the water each time.

4. Benefits:

– Free up valuable dock space!
– Lift with a fraction of the weight with the leverage design!
– Store your kayak right where you need it, on the side of your dock!

Mounting the Docksider:

You have two primary mounting options: the clamp-on mount and the bolt-on mount. Each has its advantages depending on your specific needs, dock type, and installation preferences.

Clamp-On Mount

The clamp-on mount is designed to attach to the edge of your dock without the need for drilling holes. It uses adjustable clamps to secure the lift system in place.

Advantages

1. Ease of Installation: The clamp-on mount is generally easier and quicker to install. It doesn’t require drilling, which can save time and effort.

2. Non-Permanent: Since no holes are drilled, this mount can be easily removed or repositioned without leaving permanent marks or damage on your dock.

3. Versatility: Ideal for those who may want to move the lift system between different docks or locations, or if you plan to upgrade or replace your dock in the future.

Considerations

1. Compatibility: Ensure your dock’s edge is suitable for a clamp-on system. The clamps need a stable and accessible edge to grip securely. From the top of your dock to the bottom of the side rail, the height can be no less than 2 ½ inches and no greater than 7 ½ inches.

2. Stability: While clamp-on mounts are secure, they might not be as secure as bolt-on mounts. It’s like killing a fly with a fly swatter compared to a sledgehammer. They both do the job!!

Bolt-On Mount

The bolt-on mount is a more permanent solution that involves drilling holes into your dock and securing the lift system with bolts. To remove, all you have to do is remove the 4 screws.

Considerations

1. Installation Effort: Installing a bolt-on mount requires more effort and tools, including drilling and precise measuring. It’s a fixed-position installation.

2. Dock Impact: Drilling holes in your dock will leave holes in your dock. If you plan to change the location of your lift system, you’ll need to drill new holes in the new mounting position.

Step-by-Step Installation Guide

Step 1: Choose the Perfect Location

Select a spot on your dock where the water is deep enough for your kayak and easily accessible. Ensure there is enough space to maneuver your kayak in and out of the lift system.

Step 2: Assemble the Docksider

Unpack your Docksider kit and review the included instruction manual. Assemble the main components of the lift system according to the provided diagrams. This typically involves attaching the lift arms and handle.

(If you are using the clamp-on mount, skip steps 3 & 4)

Step 3: Secure the Mounting Brackets

Using your measuring tape, mark the locations for the mounting brackets on your dock. Drill pilot holes for the screws, then securely fasten the brackets using the provided hardware. Ensure the brackets are level and aligned properly.

Step 4: Install the Lift System

Attach the Docksider Cradle Assembly to the mounted brackets (already installed). Slide the Clevis Pins on the Cradle Assembly into the designated slots of the mounting brackets.  Then secure the Cradle to the Mount with 2 more clevis pins provided. This step may require a helper to hold the system in place while you install it.

Step 5: Test the System

Before placing your kayak on the lift, test the Docksider by raising and lowering the cradle a few times. Make any necessary adjustments to ensure smooth operation.

With your Docksider Kayak Lift and Dock Rack installed, you are ready to enjoy hassle-free kayaking. Whether you are getting your kayak into the water or lifting it out after a day of paddling, Dockcraft makes it easy. Happy Kayaking!

Filed Under: Blog, Kayak Tagged With: Dock Storage Racks, dockracks, Kayak, kayak storage

March 19, 2024 by Ed Wrobbel Leave a Comment

How to Stand Up Paddleboard Using the Docksider Storage Rack

Paddleboarding is a fun activity that doesn’t require a lot of knowledge or practice to enjoy the water sport. Here are a few key tips to get you started today! 

What Type of Gear Do You Need to Paddleboard

  • A Paddleboard
  • The Right-Sized Paddle: To ensure your paddle is fitted to you, place the blade of the paddle on the ground vertically and raise your arm above your head. Your wrist should rest on the top of the handle.
  • Proper Clothing: It is important to dress for the temperature of the water, not the outdoor temperature. When it is warm outside, most people can get away with wearing a swimsuit, dock shorts, and a hat, but if you are paddleboarding somewhere cold, it might be necessary to wear a wet suit to keep you warm. Sun protection is also important.
  • Life Jacket: The Coast Guard requires everyone to wear a Personal Floatation Device (PFD) like a life jacket, carry a whistle, and if you are on the water when it is dark, you must also have a light so other water vessels can easily see you. 
  • Leash: This is helpful and highly recommended for any skill level. The leash helps you stay with your board if you fall in the water. 

Getting Your Paddleboard into the Water Using the Docksider Storage Rack

Getting your paddleboard into the water can sound challenging, but using the Docksider Paddleboard Storage Rack makes it easy if you store your paddleboard on your dock. Whether you have shallow water that you can walk into or if your dock is in deeper water, you can use the Docksider Paddleboard Storage Rack to easily lower your board into the water. Before lowering your paddleboard into the water, make sure you have all your gear with you. Simply lower the aluminum handle down towards the water and slide your board out. Once your board is out of the storage rack, push the lift assist lever back up towards the dock. To ensure your paddleboard stays with you while you are launching it, hold the leash in your hand. You can attach the leash to your ankle once you are on your paddleboard. 

The Docksider Paddleboard Storage Rack allows you to store your board conveniently where you need it when you aren’t using it. This means no more toting your board around when you want to use it. It also takes up minimal space on your dock!

How to Get on Your Paddleboard

Once your board is in the water, you are ready to get on and start paddleboarding! There are two ways you can get on your paddleboard and it depends on if you are standing on your dock or in shallow water. 

  • From Your Dock: 

Sit on the dock with your legs hanging over the edge and place your feet on the board. Grab your paddle and place it in the middle of your board, the long way. Carefully lower your body onto the paddleboard so you are kneeling or sitting. Push away from the dock before attempting to stand up. Most people like to paddle out to deeper water before standing up. 

  • From the Water: 

Make sure you are in knee-deep water so the fin of the paddleboard doesn’t touch the ground. Place your paddle in the middle of your board. Carefully place your knees on the board, about hip distance apart, and paddle out to deeper water before standing up.

How to Stand Up on Your Paddleboard 

Once you are in deeper water, you are ready to stand up. Holding the paddle in both hands, place your hands and paddle down on the board and move your feet to where your knees are. Slowly raise your chest until you are standing up. Keep a slight bend in your knees and a straight back. 

Holding a Paddle and Paddling Techniques

Place one hand on top of the handle and the other a few feet down on the shaft. The side that you are paddling on is the hand that is on the shaft. You will notice that one side of the blade is curved. Make sure when you place the blade into the water that the curved part is facing you. When paddling, your power should come from your core, not your arms. Keeping your arms straight will ensure you are twisting your torso to utilize your core muscles. While there are more paddling techniques available, these are great to get you started.

  • Forward Stroke: The forward stroke is just what it sounds, it propels you forward in the water. Submerge the blade of the paddle into the water in front of you, towards the front of the paddleboard, and bring it back towards the back of the board. Make sure the curved side of the blade is facing you. 
  • Reverse Stroke: This stroke can help you slow down or stop and can also help you turn around. Similar to the forward stroke, place the blade in the water at the back of your board and bring it forward towards the front of your board. The curved side of the blade should be facing away from you with this stroke.
  • Sweep Stroke: This stroke is useful to turn your board. Bend your knees more than you would to paddle forward or backward. Place the blade in the water at the front of the board. In a large rainbow motion, bring the blade to the back of your board. The curved side of the blade should be facing you. 

How to Get Off Your Paddleboard

Similar to how we started, you will need to get back into a seated or kneeling position. Make sure you are still in an open space before doing so. Hold the paddle in both hands, bend your knees, and slowly lower your chest until your hands are on the board. Lower down to your knees and paddle towards the dock or knee-deep water. 

  • Getting Onto a Dock: Line up your board next to the dock. Stay low and keep the leash attached. Place your paddle on the dock. Put both hands on the dock and carefully push yourself onto the dock in a seated position with your legs hanging over the dock. You can remove the leash and hold it in your hand. Using the Docksider Paddleboard Storage Rack, lower the handle down towards the water, slide your board in, and use the lift assist lever to pull the paddleboard upright. 
  • Shallow Water: On your hands and knees, carefully lower your legs into the knee-deep water until you are standing upright. Using the Docksider Paddleboard Storage Rack, lower the handle down towards the water, slide your board in, and use the lift assist lever to push the paddleboard upright. 

Filed Under: Blog, Paddle Boards Tagged With: Dock Storage Racks, Paddle Boards, SUP

February 4, 2019 by Ed Wrobbel 2 Comments

What Type Of Kayak Should I Buy

February 3, 2019 | By Ed Wrobbel, DockCraft Industries LLC

So, you’ve decided to make the plunge; and purchase your own kayak!

Then you go to your local sporting goods store or you shop online only to see the vast selection of kayaks available.  Now what?  How do I decide?

First, you need to decide if you will be kayaking on Flat water or Whitewater rapids.

If you chose Whitewater, I would venture to think that you already know enough to select the kayak of your dreams!   Therefore, we will concentrate more on Kayaks for Flat water adventures.

Flat water kayaks are grouped into two main categories:

Sit-On-Top Kayaks and Sit-In Kayaks.

choosing a kayak

Sit-On-Top Kayaks have seats molded in the top of the Kayak where you sit.  Your whole body is exposed to the sun and water – You will get wet!  These are great for people with long legs.  If you (and your pet) intend to go swimming; these kayaks are easier to get in and out of than Sit -In Kayaks.

Sit-In – Kayaks have a seat within the shell of the Kayak.   Most typically, you sit in a cockpit while your legs are surrounded by the shell of the Kayak.  They are a bit more difficult to get in and out of than Sit-On – Top Kayaks if swimming.  However, the cockpits tend to be roomier than one would imagine.

Next, types of Kayaks:

Recreational Kayaks –

These are designed for the casual paddler interested in recreational activities on a lake or flatwater stream. These kayaks are characterized by having a larger cockpit opening for easy entry and exit and a wider beam / width (27–30 inches) for more stability on the water. They are generally less than twelve feet in length. The weight of these kayaks typically range from 40 to 60 lbs.

The design makes them slower than a longer boat would be, but lighter, more maneuverable, easier to handle in and out of the water, and less expensive. Due to the wider hull, recreational kayaks will not track (maintain a straight line) as well as longer, narrower models.

Touring Kayaks –

Sea / touring kayaks are built to stroll through water for longer miles. The designs provide better speed and gliding experiences for the longer distance, as well as extra storage space for carry-ons.

These Kayaks are typically 12 to 20 feet in length with a beam / width of 18 to 24 inches. They typically weight between 55 and 75 lbs.

This design tends to trade off maneuverability and stability for speed and performance.

Tandem Kayaks –

Tandem Kayaks are typically 13 to 20 foot in length with a beam / width of 30 to 34 inches.

As there is more surface area in contact with the water, these kayaks take a little more energy to paddle.

Typical weight of these kayaks range from 60 to 85 lbs.

Pro’s:

  • Why paddle alone? – It’s easier than paddling a single kayak once the two of you are in sync. Enjoy the experience with someone else!!!  It is less expensive than purchasing two single kayaks.
  • Some manufacturers have a Tandem / Solo Conversion kit.  These allow a person to sit in the middle of the kayak to make it easier for the solo paddler to manage the tandem by themselves.

Con’s:

  • The tandem kayak is also known as the “Divorce kayak”. The biggest con is not having the freedom to do as you please. If you are not ready to work as a team, this definitely is not the kayak suited for you! Your day can turn from fantastic to horrible one paddle at a time and then the blame game starts.

Fishing Kayak –

Most fishing Kayaks are 11 to 16 foot in length with a width of 30 to 38 inches.

The extra width provides more stability for standing and moving around, especially with sit on top kayaks.

Typical weight ranges from 70 to 90 lbs.

The Sit-On-Top Kayak is preferred by many as this type of Kayak allows the angler to easily add accessories, and enables them to get out and wade more easily. However, this can be a wet ride at times!!!

Some anglers prefer the Sit-In Kayak, or cockpit” style Fishing Kayak (they have a much larger cockpit opening than the typical Sit – In Kayak). The cockpit boats are great when fishing cold water, and can be a much drier ride. And, since you’re actually down inside the boat, your center of gravity is lower and stability is often improved. However, being down inside a boat of this type makes it harder to get out should you decide to wade.

Aside from the types of kayaks an option to consider (available from many manufacturers) is a Peddle Drive system (similar to a bicycle).  This option drives built in fins or a propeller to supply your propulsion when peddling.

Beyond understanding the characteristics of the various kayaks there are other factors that need to be considered when purchasing your kayak.

Weight – Make sure that the weight of the kayak is within your means of being able load, store and launch your kayak.

Color – for safety sake!

Choose a color based on safety and the ability to be seen by others on the water. Yellow is the most visible color, followed closely by orange and red.

Blue, green, and even white will seem to blend in with the color of the water or surf.

Transporting your Kayak Home:

Once purchased, you will need to get your Kayak home!  If you do not have a car top carrier (which in most likelihood you could purchase at the location you purchased your Kayak), a pickup truck or a larger SUV, you could always rent a trailer from a local trailer rental agency.

Car topping your kayak to your launching site:

There are several sporting good stores or online stores where you can purchase a car top Carrier for Kayaks.

Do you have waterfront property?

Check out the DockSider Kayak Dock Lift and Storage Rack @ www.DockCraft.com

Our Kayak Lift and Storage rack offers convenient launching and storage capability right where you need it – On your Dock!  We have models that will suit your needs; whether you enter your kayak directly from your dock, or if you board your kayak while you are in the water.

DockCraft Industries patented design allows you to load and lift your Kayak directly from the water. With our leverage assisted design, you only lift a fraction of your kayak weight!  Keep your Dock clear for safe passage.

Watch our videos at https://dockcraft.com/product/kayak-dock-rack/

Half way down the page; select the video’s tab.

And Finally, Kayak Winter Storage –

In the Off Season, you will need to store your Kayak away from the water.

There are many Wall Mount racks available on the internet that will satisfy this purpose.

You could also utilize the DockCraft Wall Mount Conversion Kit.  This Kit will modify your DockSider Dock Lift and Storage Rack to a Wall Mounted Rack.

Use your favorite Browser, and search for: Paddling, Kayak, or Paddle Board – and one of the following:

Filed Under: Blog, Home Page, Kayak, Uncategorized Tagged With: Dock Lift, Dock Storage Racks, Kayak

January 11, 2019 by Ed Wrobbel 1 Comment

A Message from Cindy and Ed

Hi Folks,

My wife, Cindy, and I own DockCraft Industries LLC.

Our company focuses on making the best and most convenient Kayak, Paddleboard, and Canoe Dock Mounted Storage Racks / Lifts that are on the market today.

“Bold statement” you’re probably thinking; perhaps – but also quite challenging; at least for us.

A little background,

Cindy (Master’s Degree in Education) and I (Degree in Engineering and a Master’s in Business) are both retired after 30 years with a Fortune 500 company.

We live on Canandaigua Lake in the beautiful Finger Lakes area of New York State.

Of course, we love the water, the activity on the lake, and recreational kayaking!

We had a problem:

We have a break wall requiring 5 steps down to our dock. Although our lake is shallow, knee deep in the Spring at the water’s edge; the steps required us to lug our Kayaks up and down or store them on our dock creating an obstacle course as we maneuver to the end of our dock. 

I had a good idea – So I thought:

Mount a couple of boards on the legs of our dock and have the boards extend beyond the edge of the dock. Then simply lift the kayak onto the boards and tie the kayak down.

My daughter (in her early 30’s) came back from a kayak journey one day and exclaimed – I love to kayak; but, what a pain to launch and lift the kayak to store!
Two reasons:  the cockpit fills with rain and sloshes around when launching, and the weight and bulk of the kayak create a cumbersome situation when lifting on the boards- especially if you try to lift one end and then the other.

“The DockSider” Kayak / Paddle Board Lift & Storage Rack was born!

After my daughters’ statement we got to thinking and watching our neighbors launch their kayaks.

For those with a sick sense of humor – it was actually quite comical.

Our Kayak / Paddle Board Dock Lift and Storage Rack:

  • Clears your Dock decking by sitting on the side of your Dock.
  • Lift with a fraction of the weight due to the patented leverage assist mechanism.
  • Stores at an angle eliminating Rain entering the cockpit.
  • Has height to water distance adjustment via pins and slots; to accommodate different water levels.
  • Our products include models for those that board their Kayak while in the water or from the dock (mucky /stony bottom, or Deep Water).
  • The mounts create loading on the decking of your dock not the side boards.  If your dock can hold you; it will hold your kayak or paddle board.

The patent for our Kayak & Paddle Board Lift / Dock Rack was issued in 2012.

Our primary reason for starting DockCraft Industries is to share our products with those that have a similar problem as ours.

Over the years we have had Thank You letters / emails from:

  • 25 to 80-year old’s
  • Husband and Wives
  • Grand Parents and Grandchildren
  • Customer Neighbors and Friends

It gives us great satisfaction and pleasure hearing that our customers find our racks so useful and convenient.

We hear:

  • I did a Happy Dance!
  • Wow, I use my kayak paddleboard much more now!
  • Unique / Easy to install and use / Great Quality!
  • My 82 year old Mother can now enjoy her Paddle Board!
  • See our Testimonials @ https://dockcraft.com/testimonials/

Our Business is based on our Customers:

  • The customer is the most important person in our company.
  • Without our customers we wouldn’t have a business.
  • The customer is not dependent on us, we are dependent on the customer.
  • We are not doing the customer a favor by serving them, the customer is doing us a favor by giving us the opportunity to do so.
  • The customer is a person who brings us their wants. It is our job to satisfy these wants to the benefit of Our Customer and to ourselves.

We are here to serve our customers – Email or Call us:

  • If you have any questions or have a unique application relating to our Dock Racks.
  • Have a problem or product idea for your dock or paddling needs; perhaps we could help!
  • Have a particular topic you would like us research and share.
  • Or simply want to share some info about your waterfront.

Thank You for taking time to read this blog.

Our Best to All !

Cindy and Ed

Filed Under: Blog, Home Page, Kayak, Paddle Boards Tagged With: Dock Lift, Dock Racks, Dock Storage Racks, DockCraft Industries, Kayak, Paddle Boards, Peddle Boards

Shopping Cart

Shipping within New York State? We discount the Sales Tax amount! Use Coupon Code: Save the Sales Tax

Why Choose Us?

A Kayak Dock Rack & Lift
that's Neat – Convenient – Affordable

  • Lift directly from the water!
  • Lift with a fraction of the weight!
  • Minimize rain entry!
Stainless Steel Model available Great for Salt Water Harbors.

Watch the Videos ›

We ship via UPS

Connect With Us Today:   Facebook   YouTube  YouTube

Copyright © 2009-2025 Dock Craft · All Rights Reserved · Policies